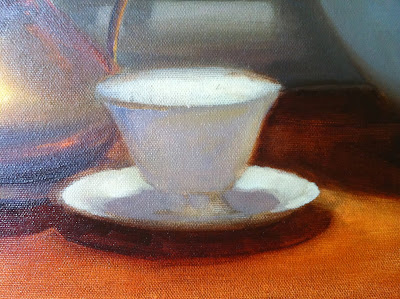
*CLICK ON ANY PHOTO TO VIEW THE FULL SERIES OF STEPS MUCH LARGER!
First Pass:
Begin the Initial Lay in for the Teacup
The image above, as well as the photos that follow, will show a progression of steps that were followed as I painted a teacup - one of the many objects found in my larger painting called "Illuminated." I hope these photos and captions help clarify my approach to painting an object like this in a still life.
Second Pass:
Add "Lightest Light" on the Teacup and the Value and Temperature of the Shadow. Notice how the values in the shadow are unified in value, but vary greatly in temperature.
(*NOTE: The camera had difficulty balancing the strong white,
so glare showed on the brass in the photos.)
Third Pass:
Form Scalloped Rim, Add Gold Trim & Lots of Color in the Whites,
Add Base of Teacup (The teacup is becoming "firmer" in form and more distinct from its surroundings.)
Fourth Pass:
Add Handle and Reflection on Right Side, Add Floral Designs, Finish Gold Highlight (I begin to check for symmetry and realize the bottom left of the cup is too narrow at this point.)
Fifth Pass:
Emphasize Glow Inside, Add Reflections Near Scalloped Edges,
Straighten and Broaden Left Edge of Cup to Create Symmetry at Base
This is the full "Before" Picture.
(*Colors are a bit off - see below for fuller, rich color.)
*PLEASE CLICK ON THIS PHOTO TO VIEW IT MUCH LARGER
Last Pass:
Add Rich Wood Tabletop with Reflections of Shine, Darken Bowl,
Finish Candlelight Glow and the Crystal Candlestick
Hope this series of photos/captions was helpful! See you in class!


No comments:
Post a Comment